Friday, July 30, 2010

Studio time just for fun...


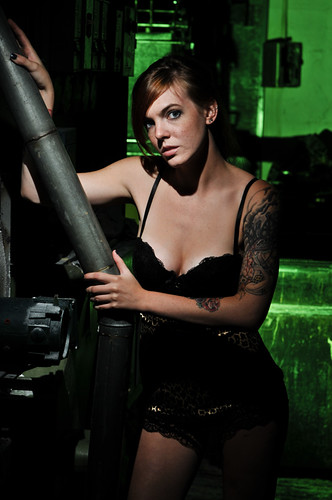
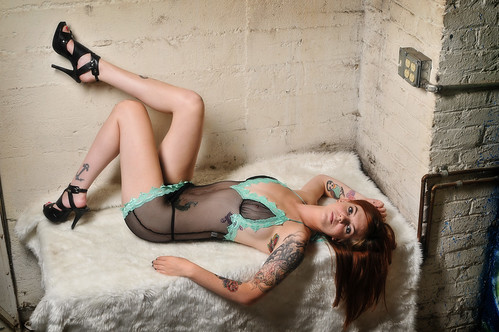
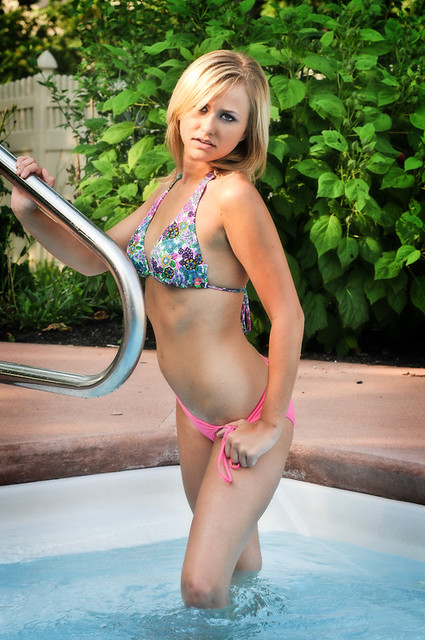
Hey everyone. Glad to see you found your way back. It's been a typical week for us over at RedDoor. Studio shoots, on location corporate work, and tonight we have a wedding. All in all it's been an eventful week. Last Sunday my good friend Frank Tuttle of Tuttle Images came down to shoot and brought along a few models with him. We spent the day working our way around the studio, shooting different themes, and sets. It was a good day. It's nice to have time to shoot just for fun. No real purpose, no one to please but yourself(although sometimes we can be our own hardest critics). Above is Grace. She is a wonderful model from the Columbus area. Such a pleasure to work with. She had many, many different looks, and the ability to "turn it on" on command.

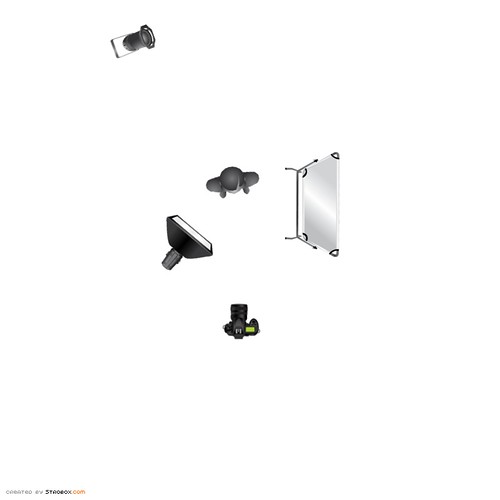
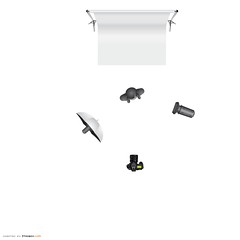
For this particular shot, Frank did the lighting setup. I think he did a wonderful job. The main in this situation was a gridded strobe camera right about 2 feet from the subject's face around f/5.6. Fill was from a brolly box camera left and feathered way up roughly f/4. Below is a diagram showing the setup.

gridded setup

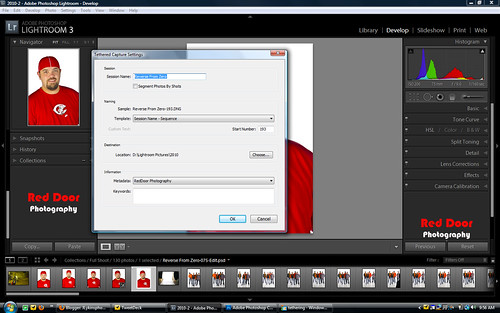
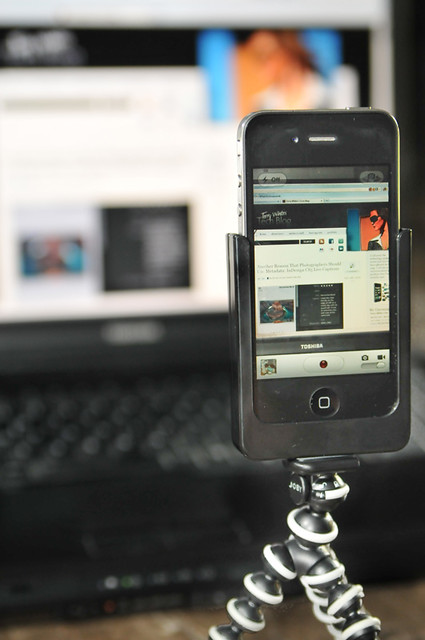
Hit the jump for more lighting setups, shots, and even a little video showing Franks workflow(and dancing that day)!


JRL_6200-Edit

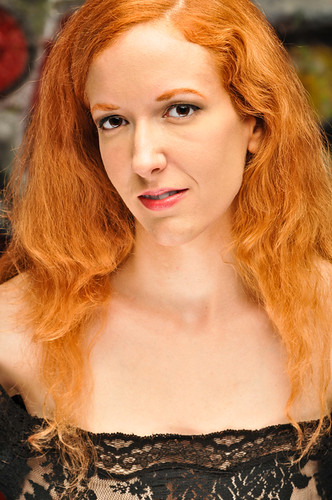
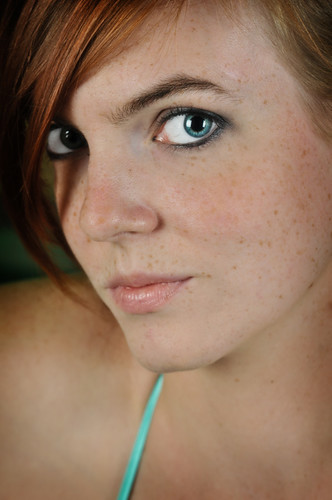
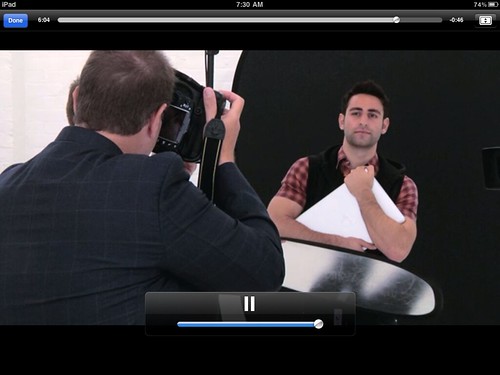
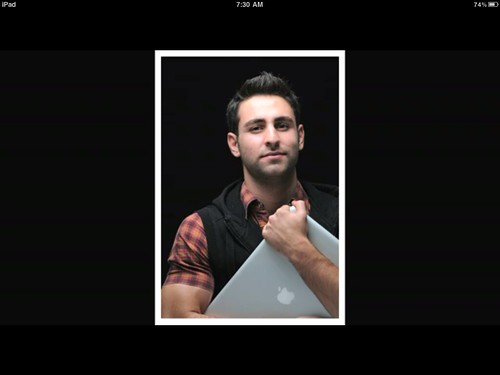
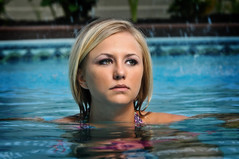
Like I said, Grace was wonderful to work with, and she had so many different looks that we were able to move around the studio quickly. Here, we did what's commonly referred to as Clam Shell Lighting. We placed a 5foot octobox above grace set to roughly f/5.6. Just below her face we had a strip box set to f/4. This gives us a high key, almost shadowless "glamour shot" of grace and her wonderful skin. Notice the two distinct catch lights in her eyes? One from the lower strip box, and one from the upper octobox. There was about a 2 foot gap between the two boxes in the front that we shot through.

A helpful tip for shooting this setup: The idea is to get a high key, bright image. To do this, we often times "open up" our aperture by one stop. For example, this setup metered at around f/5.6, but to get the brighter look, we shot at f/4. This made the image 1 stop brighter than it would have been at f/5.6.

Frank Studio day-278-Edit


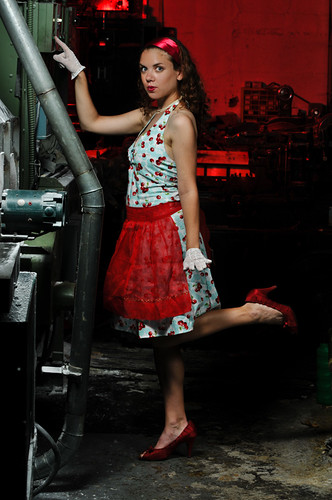
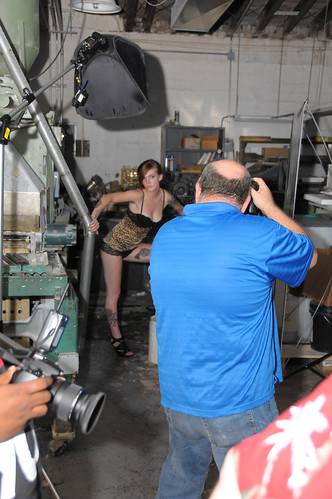
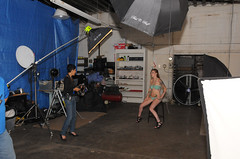
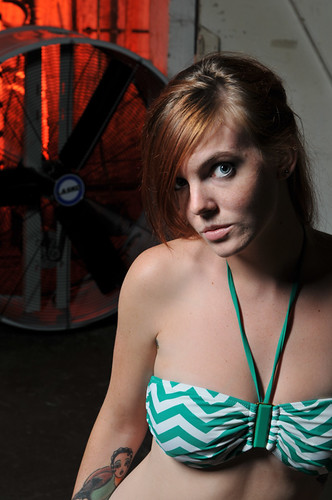
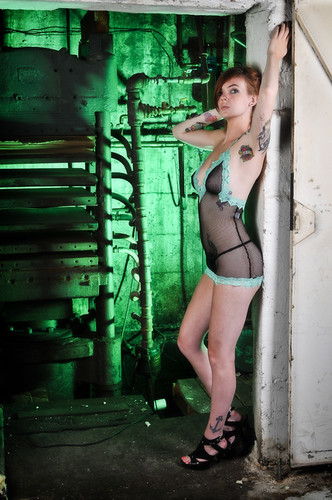
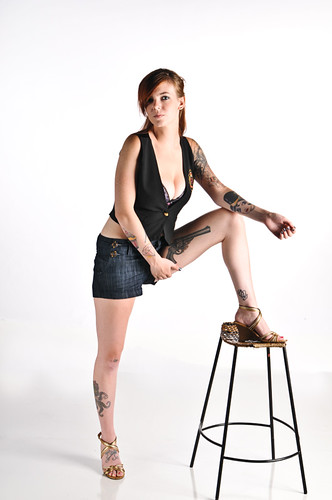
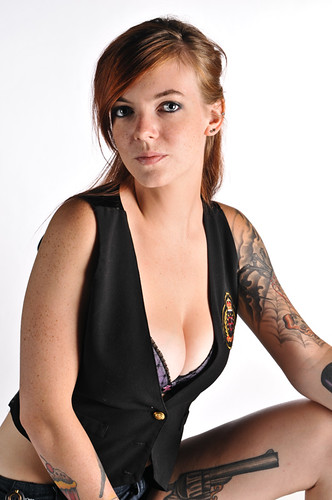
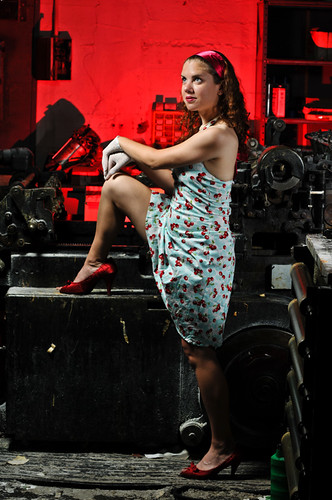
While Grace was a wonderful model, it was Casey that took the "prize" for best outfits. First she came out in what I would call "50's housewife attire" and had the attitude to go with it. It was great. She posed on several different sets, one of which being the "industrial area" of the studio. The idea for a shot like that is to make her look as out of place as possible. It puts an emphasis on her, drawing your eyes in. She was a wonderful sport, shooting the below shots even though getting her leg up that high with heels on was difficult.

Frank Studio day-298-Edit

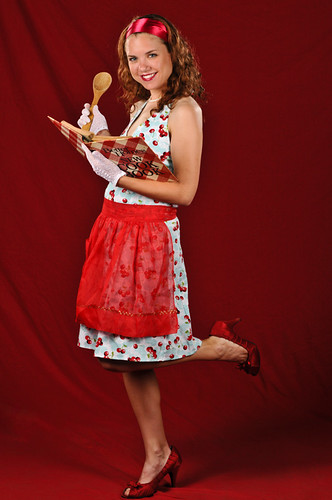
and of course what 50's housewife would be complete without her "Betty Crocker" cookbook:

Frank Studio day-234-Edit

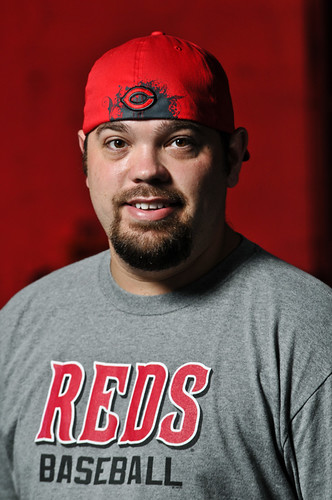
Shad even talked me into stepping in front of the camera for a shot or two:

Frank Studio day-259

Frank Studio day-257-Edit

But not to be outdone, Frank shows us his great interaction with the models, and of course his dancing skills:


Thanks for stopping in and checking out my latest work. See you again soon. Jason
Read more on this article...

Monday, July 26, 2010

2010 World Wide Photo Walk Cincinnati

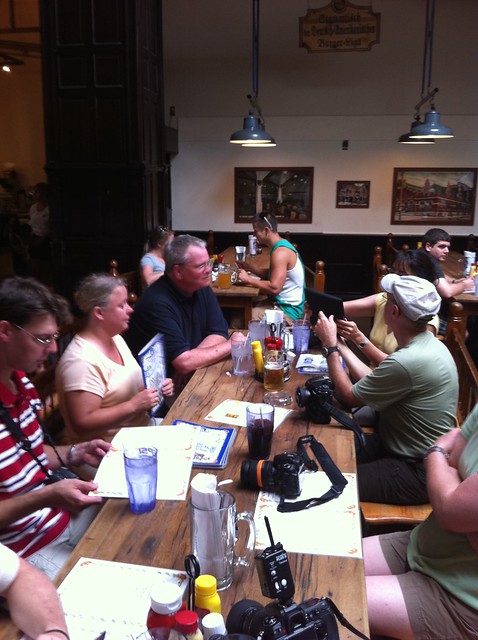
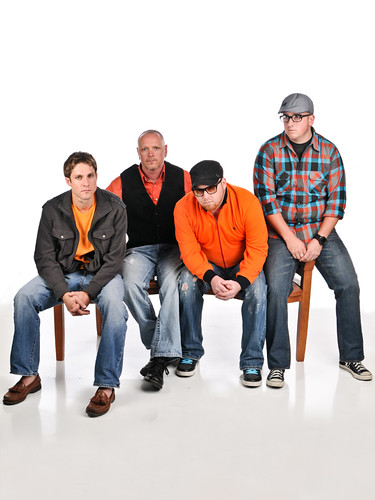
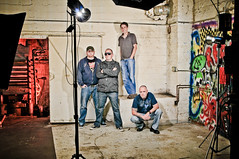
Group Photo By Wendy Ramsey

Hey everyone! Glad to see you're back! Over the weekend I had the privilege of leading the World Wide Photowalk organized and sponsored by Scott Kelby. This is the second year that I've led a walk and just like last year, it was a blast! There were 50 Photographers signed up, but I think because of the temperature being in the 90's(with a heat index in the 100's!) some people didn't show up. Some emailed me in the days leading up to the walk to tell me that they weren't going to be there. All total we had about 25-30 photographers show up. We still had fun!

We ended up at the Hofbrauhaus in Newport Ky where everyone enjoyed all of the beer cheese and bratt's they could eat!

IMG_0186

They even had live entertainment:

IMG_0185

Hit the jump for some photos from the walk...


Beating the heat...

JRL_6108

shoehdr

2010bridgehdr

Many thanks to the photographers that joined in the fun this year! If you didn't make it out this time around, be sure to look for it again next year! Jason

Read more on this article...

Friday, July 23, 2010

Shooting Tethered with Lightroom3


Hey everyone! Glad to see you made it back! It's my goal to provide useful, easy to understand content that helps you with your photography. The fact that you're here, reading it, lets me know that I'm doing a good job.

That's Reverse From Zero pictured above. They're a Cincinnati based rock alternative band. They were over the other night for some updated group shots to go with their new EP. These guys are a blast to work with! Fun, outgoing, "willing to try anything" type of guys. They were happy with the outcome, and so were we. I took this opportunity to try out Lightroom 3's new tethered shooting option for the first time in a live situation.(note: I never try out something totally new with a client. I had already played around with the tethering feature just to get the controls down.) Previous to this latest version of Lightroom, we were using Nikon's camera control 2 for our tethering needs. This worked "ok" but was slow, and there were a bunch of steps you had to go through just to get it up and running. Lightroom 3 eliminated those steps, and has made the image playback almost instant. So hit the jump to see how it works, some sample pictures, then some more from our Reverse from Zero shoot...


I don't know about you, but I'm a "freak" when it comes to eye sharpness. When I'm shooting portraits, I want the eyes to be so tac sharp that they're the first thing that you see, and the area of the photo that you keep going back to. That being said, it's a real pain in the butt to use the display on the back of your camera to see if they're really that sharp. Sure you can zoom in, and get a pretty good idea but to really see what it's going to look like you need a large monitor. I prefer something 24inches or larger. When we're shooting in the studio, we have a 24inch monitor hooked to a laptop so we can see the shots as they happen, and then zoom in to certain areas if we want to check sharpness etc. To do this you need a tethering program. For the longest time the only option we had was Nikon's Camera Control 2. With this program you could set your shots to come into the computer, save in a specific folder, then have Lightroom "watch" that folder and automatically import the images into Lightroom etc. It was a process to say the least. With the introduction of Lightroom 3 Adobe has done away with the need to use a third party program and allows you to tether right into your catalog strait from your camera.

Setting up Lightroom to tether is simple. The first thing you want to do is attach your camera to your computer via a USB cable. Turn your camera on so that the computer recognizes it. Launch Lightroom 3. Once your catalog has loaded go to FILE-TETHERED CAPTURE-START TETHERED CAPTURE. As shown here:

tethering2

When you click on Start tethered capture, you will get a dialog box asking you for some input. It wants to know what you want to call this shoot. For this particular shoot I named it the band's name "Reverse from Zero". You also have a file naming option. Which I set to Session Name-Sequence. There's the destination to be imported to. I keep all of my images on an external drive, so my location shows that. Then there is the information. Just as in Import, you can add metadata, as well as keywords. Here's a snap shot of that dialog box so you can see what I'm talking about:

tethering3

Once you fill out this info and click OK, you will get a control bar at the bottom of the screen that looks like this:

tethering

This bar shows the basic information coming from your camera. It has your shutter speed, aperture, ISO, and white balance. It also shows the camera model you're shooting with. On the right side of the tool bar you see an option for Develop settings. This allows you to add whatever develop settings you want as the image is brought into Lightroom. For example, if you take the first photo, and you see that you want to give it a little more midtone contrast, you can make your adjustment to your first image, select the develop settings button on the tethering tool bar and select the "Same as previous" option at the top of the flyout window as shown here:

tethering4

As you can see, there are a whole bunch of options to choose from when it comes to the develop settings. If you want a certain look to be applied to your image immediately when it comes into Lightroom, this is the way to do it.

When you start shooting, you will immediately(especially if you ever used the old method) see how fast the images show up on the screen. I'm using a relatively mediocre laptop(dual core processor, with 3 gigs of ram), and the shots show up almost instantly. If you've never shot tethered, I urge you to try it out. It is one of the best ways to see all of the detail in the images, as well as catch problems while you're shooting and can still fix them, instead of after the shoot when it's too late. So that's it. That's the new tethering option in Lightroom 3 in a nutshell. It's a simple strait forward approach to managing a shoot and making sure that the images are in focus, where you want them to be.

As promised, here are some more shots from the same shoot. Thanks for stopping by, see you next time! Jason


Reverse From Zero-103-Edit

Reverse From Zero-098-Edit

Reverse From Zero-144-Edit


Reverse From Zero-123-Edit

Read more on this article...

Monday, July 19, 2010

Gel that light


Hey everyone! Glad you made it back to see us over here! Busy, busy weekend for us at RedDoor. We had a great workshop on Saturday that went off without a hitch thanks to the wonderful Jill(pictured above). The theme of the workshop was "Inked", and let me tell you Jill WAS INKED! As always we had a few setups in mind going into the shoot, but we're fluid. We like to flow with things, and do whatever comes to mind. That is what happened for the shot above. We have some industrial equipment in the back corner of our studio left by the print shop that was in there before us. We haven't used it(up until this point) for any photo shoots, but with Jill's look, and the theme... I couldn't resist. Hit the jump for some behind the scenes looks at the lighting setup for this shot, plus much more from the workshop!


I like gels. Scratch that, I love gels! With the simple addition of a piece of colored "film" you can turn a blah photo in to a WOW! photo. Case in point,if I had just added a flash in the background of this image to light the industrial equipment, you wouldn't get near the effect. The addition of the green(actually 3 pieces of full cut CTG) sets the mood for this shot.

The setup is pretty simple. We had one Sb900 speedlight camera left behind a piece of equipment and the subject. This was set at 1/4power on manual mode. The Main light for the subject was a Sb900 on a boom shooting through a 24X24inch soft box. The fill was a 3foot by 6foot silver reflector camera right just out of frame. Below is a diagram showing the setup.

IMG_0151

Also I have a setup shot showing everything(minus the hidden flash for the background).

SR2_4615

As you can see everything is triggered with Pocket wizard wireless transmitters to ensure consistent firing.

The addition of the green does two things in this situation. First it sets the ominous mood. When I see a background lit with a really strong green, blue, or red gel my mind goes back to Dick Tracy, or theatrical crime scenes. You know the alley way, or the abandoned factory that the damsel in distress shouldn't have been in, in the first place. You see the moody, colored background and you know something sinister is about to take place. That's what I was going for here. Second, and equally important is separation. When you have two different "light planes" that is, two areas of the image that are lit differently you give your subject a more 3 dimensional look. That's our goal as photographers after all right, to take a 2 dimensional photograph and have the subject feel like they were there. Lighting different areas of the image separately helps us accomplish this.

On that note, lets take a look at another image from the workshop. This time the model is out in the open. She's about 10 feet from the boiler room door and the industrial fan. Equally She is 10feet away from the graffiti wall to the right. Again we used a gel(this time a red one) to add some dimension to the boiler room, and let you(the viewer) know that it was supposed to be hot back there. We didn't stop there though. We added a gridded strobe to the graffiti wall camera right. It was set about 25degrees from the wall with a 1/8 honeycomb as to just "skim" the wall with light. We didn't want full on POW blast of light. Just a subtle touch, again to separate the model and give her some dimension in the room. The model was lit by a Strip box on a boom above her an camera left at around f/8. We filled the opposite side with another strip box camera right feathered forward a touch and set to f/4. I wanted a large transition area between the model and the background. So the model is lit, then shadow, shadow, shadow, then the background is lit. This creates clear and concise areas of light.

JRL_6020
(Click on the image to make it full sized)

Again I have a setup shot of the whole thing with one of the students(I say students, but in reality these are quality photographers that do wonderful work) shooting the model.

SR2_4617
(Click on the image to make it full sized)

(note: the octobox above the camera pointed at the subject is not firing, it is just on a boom above the model)

Here are a few more from the shoot with the same lighting setups just a little different angle or crop:

JRL_6031

Inked Model-052-Edit

Inked Model-035

JRL_6041-Edit

These next two were done first actually. I always, always start on white seamless with the models. It gives me an opportunity to work with them, get them into the rhythm of the shoot before we move on to more obscure things.

Inked Model-017-Edit

Inked Model-018-Edit

As for this last image, we laid out some fur that we have laying around the studio. Set a Strip box above and slightly camera left of the subject. We also had a kicker coming from a gridded strobe camera right at about 1 stop over the main light just to add a bit of dimension to the subject.

Inked Model-063-Edit

I had a blast at this shoot! We really got to experiment with some of my favorite kinds of lighting, and really play with some colors and gels. I hope you've enjoyed the images, and the lighting explanations. See you all again soon! Jason


Read more on this article...

Friday, July 16, 2010

Scott Kelby's Photo Recipies Live


Hey everyone! Glad to see you back. If this is your first time here, welcome! Many of you know that I'm a big supporter of the iPad as a tool for photographers. I did a post a week or two ago about the benefits of owning an iPad as a photographer, as well as ways that it can make you money. Now I want to show you how it can make you a better photographer. Scott Kelby, (author of many, many popular and highly regarded photography and photoshop books)just released his first iPad application. This application is based upon his series of books entitled The Digital Photography Book. It gives you a behind the scenes look at what goes into a photo shoot, and what he was thinking as he made the shots. Hit the jump to learn more about this app, and where you can find it for you iPad or iPhone...


Terry White did a wonderful review of this app over at his site bestappsite.com, and true to Terry White form, he did an awesome job of reviewing it, so you should definitely check that out when you get a chance.

For me, this app was a no brainer. I'm a NAPP member, long time follower of Scott Kelby's work, and pretty much follow what's going on down at NAPP headquarters on a regular basis. Terry wrote in his review that the size startled him initially. 1.3GB's is a large App but I was pretty sure if it was that big, there would be lots of useful content. Boy was I right! There are 14 categories to chose from. They are:

* Window Light Portrait
* Couples Portrait
* 3-Light Setup
* Clamshell Lighting Parts 1 & 2
* Shooting Food
* Shooting Flowers
* Location Shooting
* One Light Overhead
* Hard Lighting
* Ring Flash Adapter
* Pano Shots
* Portrait Lighting
* Dramatic Portrait Look
* Product Shots

They're organized in an easy to navigate menu:

IMG_0011

Once inside the category you select, you have a few options. First you can just watch the entire caegory(which I highly recommend). Here you will see the shoot from start to finish. Scott does a good job of explaining the scene setup, the lighting, the camera settings, posing, and much, much more! He doesn't hold anything back.

IMG_0012

IMG_0015

IMG_0014

You can view certain clips(this would be helpful if you wanted to see a certain part of the segment). Then there's the behind the scenes option. This is a really cool section because he adds additional information that he was thinking and didn't say at the time of shooting, or stuff that came to mind later.

IMG_0013

At $9.99 this is a really good deal. $9.99 is cheaper than most photography books with far less content. I recommend this application to anyone that is interested into photography. Newb to Pro, everyone can learn from this information!

You can find it in the APP STORE.

See you all next time! Jason
Read more on this article...

Thursday, July 15, 2010

At the pool!(again)


Hey everyone! Glad to see you're back. It's been a really busy few months for us at RedDoor Photography. We expanded our business model when we moved into our new studio to include workshops/organized shoots. That has taken a life of it's own and now includes nearly 200 members, a team of dedicated models, as well as multiple shooting locals. If you're interested in joining us for these shoots you can click on "Glamour Club" from our main website or go directly to the Glamour Club website by clicking HERE.

Our latest shoot was at a private residence in Fairfield Ohio. We wanted to do a water shoot, specifically a swimming pool shoot. Hit the jump to see some of the images, and talk a little about the lighting setup.


JRL_5811-Edit-Edit

We started out the day shooting in the hammock with the lovely Jessica. The ambient light was 1/125th of a second at f/8. We wanted to make the sun our fill so we underexposed our background by roughly 3/4 of a stop and set our shutter speed to 1/160th of a second. This made the background a little darker. Then, we moved in a strip light camera left just out of frame and set it to f/8. The result is a beautifully lit model with nice catch lights in her eyes.

We quickly moved to Kelsea where we kept the lighting the same, but moved the strip light around a little more towards her face to keep the eyes lit, as well as make sure that we didn't get deep shadows in the eye sockets.

JRL_5822

The key here was to keep the light the same distance from the subject as we moved it. By doing this, we didn't have to re-meter the strip box, it stayed at f/8.

JRL_5830-Edit

We moved into the pool from the hammock. This is one of those situations where we break the "rules" and still have a beautiful image. We placed the main light coming from the same direction as the fill. The sun was setting to camera left, but it was behind the trees. We still wanted to use the sun/ambient as the fill light and set up a strobe as the main. What we did was place a beauty dish on a boom extended to about 2 feet from the models left side. Now even though the main and fill source were coming from the same direction, the fact that the sun was behind the trees allowed us to actually use the entire sky as the fill. We determined that the ambient exposure was f/8 1/125th of a second at iso200. again to darken the background we underexposed, but this time we underexposed by an entire stop to 1/200th of a second. This made our settings f/8 1/200th of a second. We lit the model with the beauty dish as the main, the sky(and water) as the fill. This brings up an interesting point. When you're shooting in water, you have a natural fill card/reflector there. Water will reflect light really well, so when you light the subject from above and left like we did here, the light will cross her face and body, hit the water on the opposite side and reflect back filling in the shadows naturally.

This brings us to my next image.

JRL_5864-Edit

Again we used the water as a fill. One light(sb900 speedlight) through a 24X24inch softbox camera right. When we were testing for this shoot, I actually got a similar shot that I liked much better found HERE.

Needless to say we had a great time. The models were wonderful to work with, and everyone left with tons of portfolio quality shots. If you'd like to join us for the next shoot, be sure to visit the site to see when our next shoot is.

Thanks for stopping by! See you all next time. Jason


Read more on this article...

Wednesday, July 14, 2010

iPhone4 Tripod holder


Hey everyone! Glad you all made it back to see us here at the blog. The image you see above is from our latest shoot, which happened to be with our Glamour Club. The model Kelsea was wonderful to work with, and we got some wonderful images. I'm going to do a post all about the shoot, and the lighting tomorrow but I thought I'd give you a sneak preview of one of the shots. Today I want to tell you all about what the UPS guy dropped off at my door today, the G Design tripod holder for my iPhone4.


iPhone holder 4

This holder allows you to place your iPhone4 on a tripod to shoot pictures or better yet, take advantage of the new iPhone's HD video capability... You know what that means right? Expect video content on the blog very soon... Hit the jump for the review and some more photos...


The first thing that I noticed when I pulled it out of the package(and noted on the G Design site) is that this holder is just the G3 version with the addition of small inserts to hold the thinner iPhone4 tightly. Check out the shot I took of it:


iPhone holder 3

The holder is made out of quality ABS plastic with a tripod mount at the bottom. I plan on using it for video blogging, and with the orientation of the iPhone's camera as well as my screen width on my laptop I need to turn the iPhone horizontal to capture all of my screen without excess background. Because of this, I would have liked to see a tripod mount on the side of the unit as well as the bottom. My gorilla pod wouldn't hold my iPhone in a horizontal position without tipping over so I will have to attach the iPhone to a larger "standard" tripod to do the blogging. Still, this holder is the best product I've found on the internet for the money for any version of the iPhone, and the only unit(that I've been able to find) that works with the iPhone4 without some "rigging". Here are a few more shots of the unit with the iPhone in it:

iPhone holder 2

Here I've got my buddy Terry White's iPhone app open. This is to show appreciation to Terry for turning me on to the 3G version that he reviewed HERE. After seeing his review I contacted the people at G Design about the iPhone4 unit and(to my knowledge) I'm one of the first to have and review it.

Here's another showing the iPhone4 in the vertical position and the video camera in action. (Note that I'm not getting the entire screen in the vertical position on the iPhone)

iPhone holder 1

So as you can see the unit works really well, is built well, and looks good. If you're a photographer looking to take photographs with your iPhone4 or if you're someone looking to use the iPhone4 for video, this is the unit you want to hold your phone.

Thanks for stopping by, see you all soon! Jason

Read more on this article...